Create workflow
Create a map
The very first step of every migration is to start building the workflow. Since Fast2 is an ETL, the sequence of all tasks needs to meet this philosophy :
- first you extract/retrieve the content,
- then you perform any required transformation to get the content compliant with the target system,
- finally you load the content and/or its metadata.
With Fast2 started, go to the UI (default address http://localhost:1789/index.html). From here, you can create a new map browse your machine to import an existing one.
Any change about the map configuration/structure needs to happen in one place only : the design place. Changing the map name, adding or configuring either tasks or links, all these operations will take place in the Design Place.
To add any task to the map, toggle the right panel and search for the task. The dynamic search bar filters out all matching task based either on their name or description. To select a task, click on its name and it will appear in the design area. You will be able to configure it straight afterwards, since the right panel now displays the configuration fields of the task you just added.
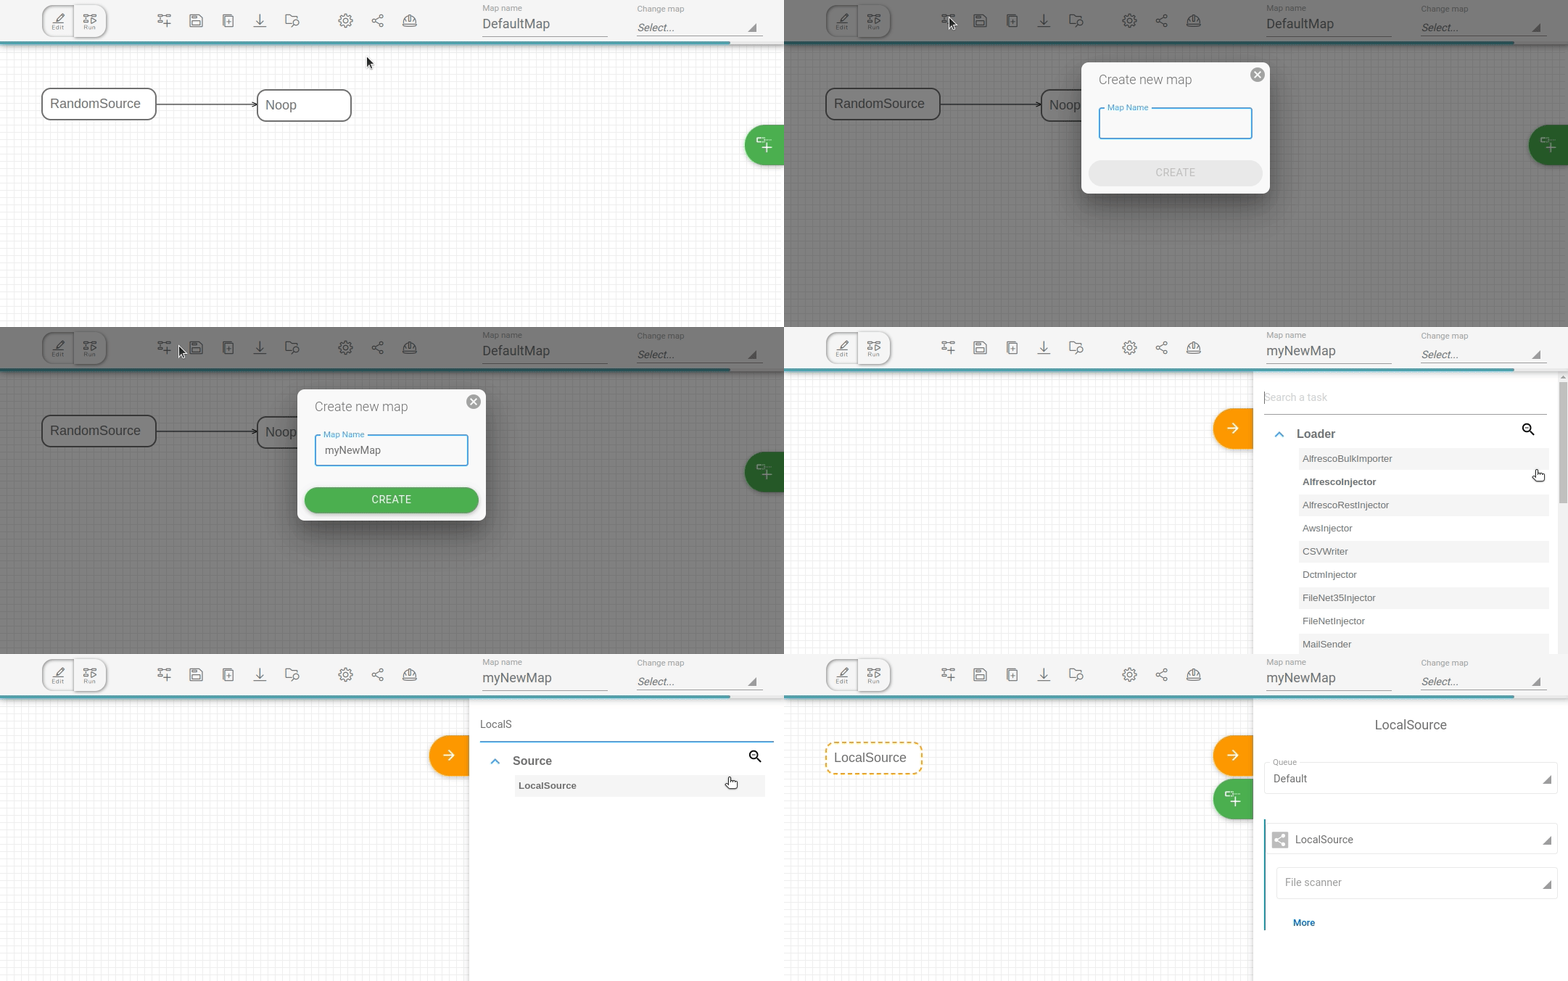
For task and link configuration, please head towards the task configuration and link configuration sections.
Set and edit map name
The map name can either be set from the pop-up when creating/duplicating a map, or changed later on.
- A map name cannot be empty.
- Every map must have a single and unique name, whatever its version.
When the map is displayed, the name can be updated by directly from the top banner. Once its name edited, the map needs to be saved, otherwise the name will remain as was.
Download a map
Any map can be downloaded directly through the Fast2 UI. Select the map you want then click on download icon located at the top banner.
You can also reach maps from the installation folder of Fast2, in the /maps folder.
Fast2 also stores maps into the database instance.
Upload a map
V1 maps are compatible with the V2, but not the other way around.
Click on the browse icon at the top banner and select the map to upload. Fast2 will automatically switch to the freshly uploaded map.
If you upload multiple times the same map, Fast2 will create a new copy of the map by putting at the end the next suffix <_V-n>, where n is the version number of your map.
Delete a map
To go on the configuration place, click on the gear icon at the top right banner. Use the checkboxes to select the map(s) you want to delete then click on the bin icon.
However, a backup copy is still saved in the database in case you want to restore it later.
Tasks
Add task
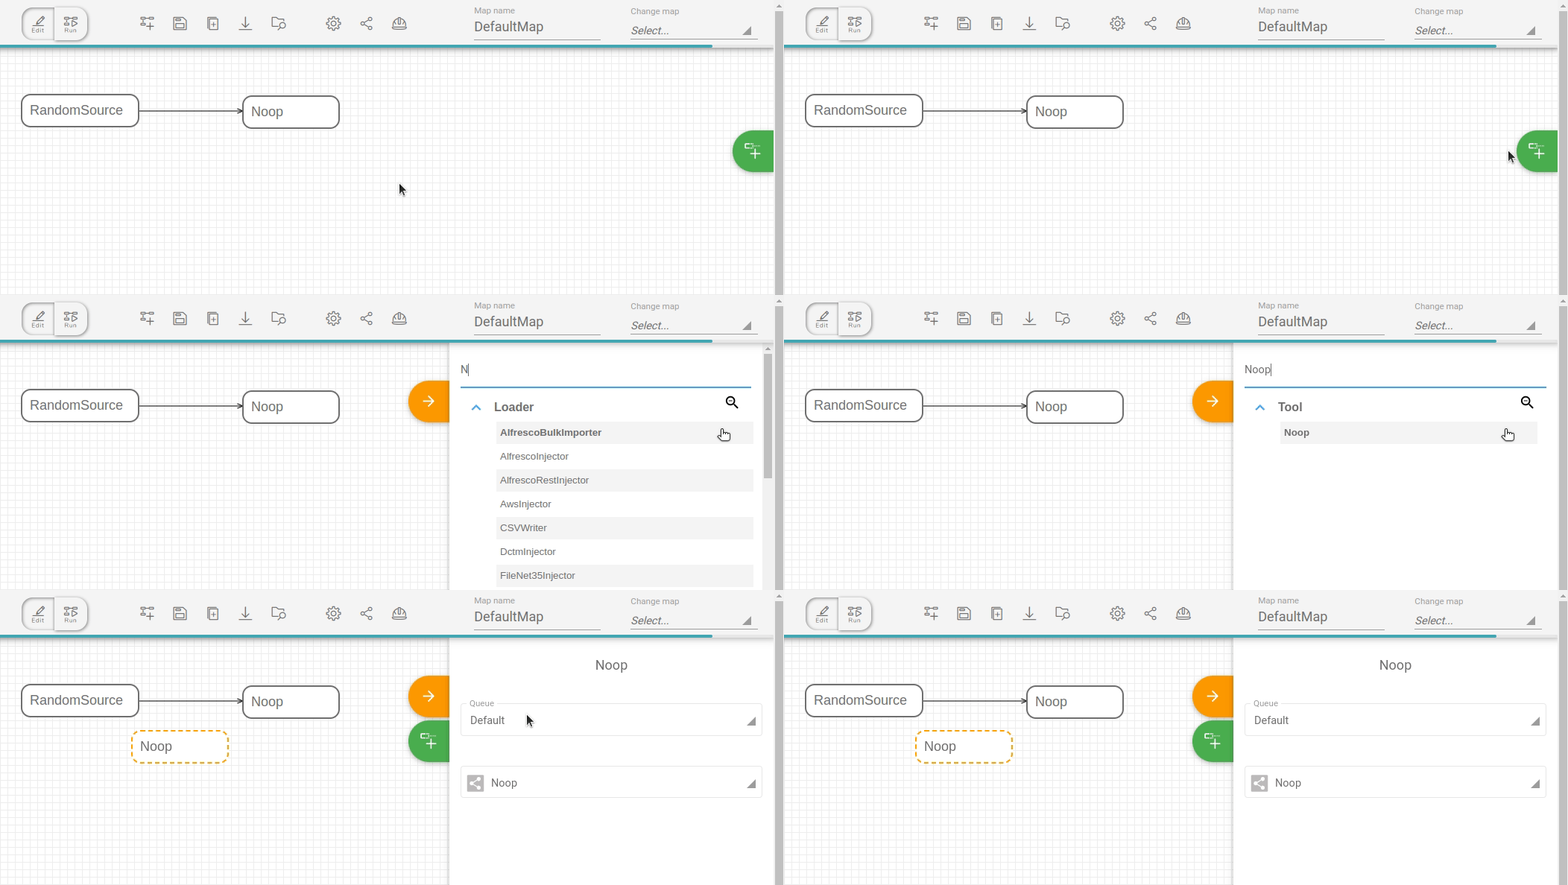
To add any task to the map, toggle the right panel and search for the task. The dynamic search bar filter all task matching based either on their name or description. Then select a task by clicking on its name. It now appears in the design area. You will be able to configure it straight afterwards, since the right panel now displays the configuration fields of the task you just added.
Configure task
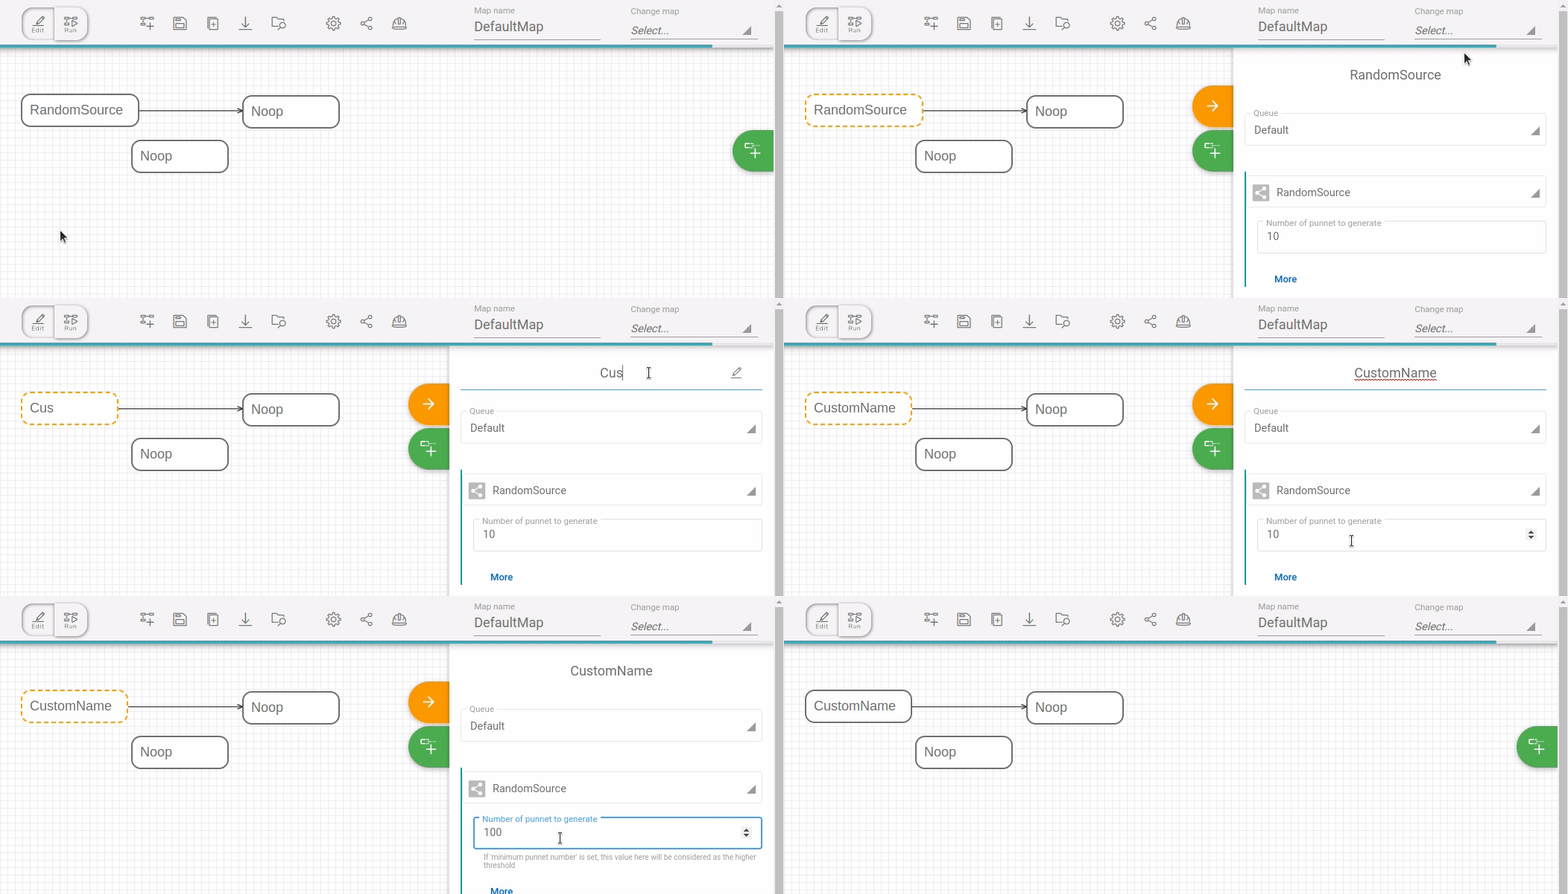
To configure a task, hover it in the design area. When it gets dark grey, hit the gear icon : the task is now highlighted and the right panel displays the configuration fields for you to fill.
Delete task
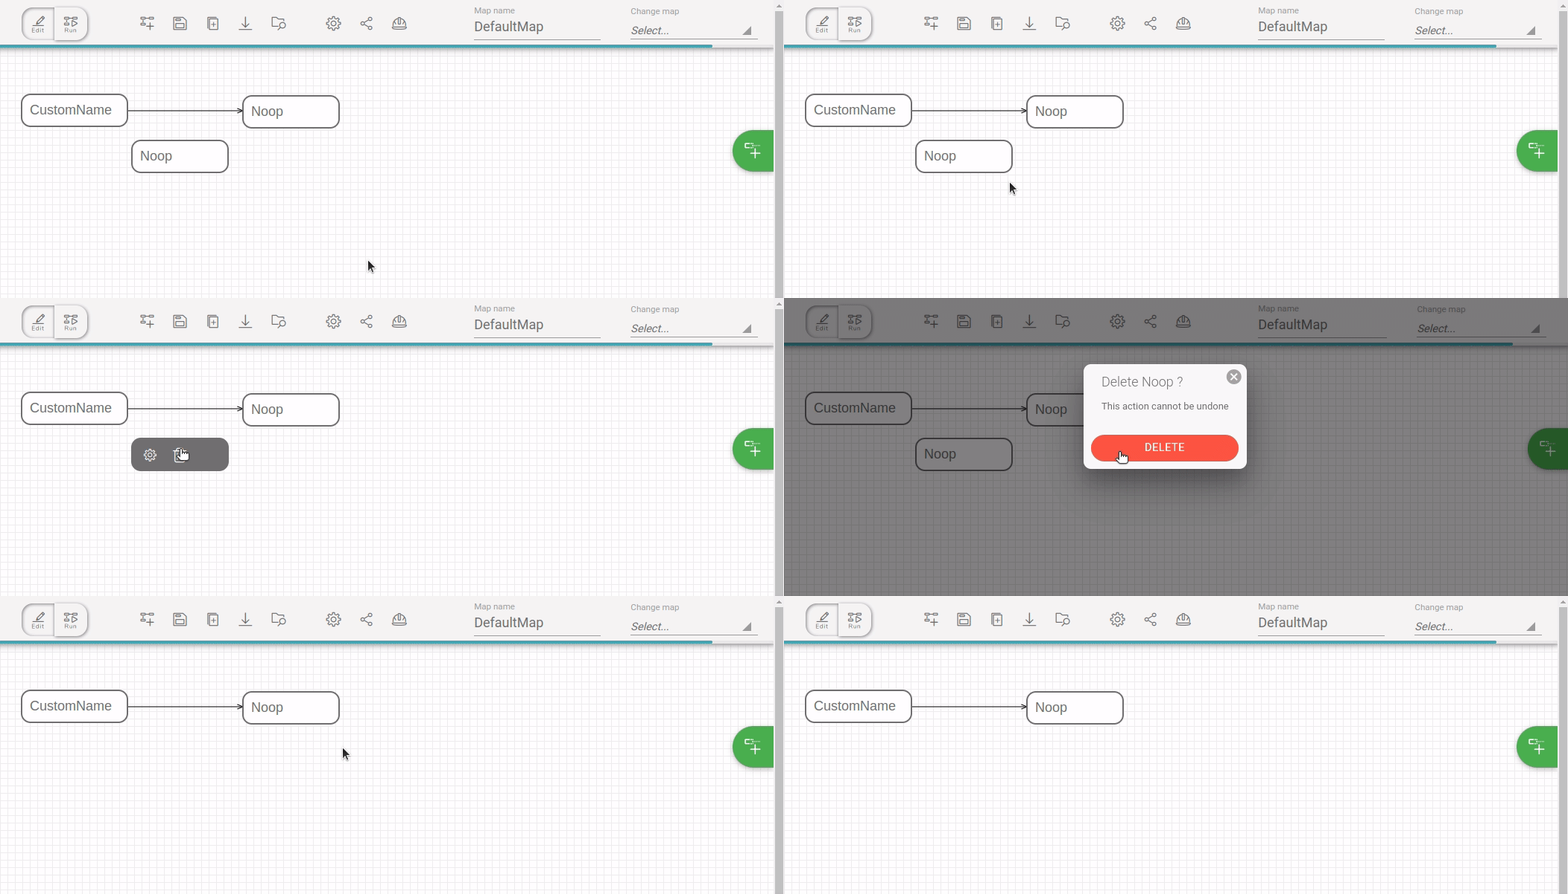
The deletion of a task is a 2-step long procedure. To delete a task, hover it in the design area. When it gets dark grey, click on the trash icon. On the confirmation pop-up, make sure you perform the operation on the task you really intended to delete.
Links
Add link
To add a link between two tasks, click and hold the orange link of the originator, and drag it onto the receiver task widget. One task can have multiple input and output links.
A link can only be added between two tasks. That implies the deletion of any link attached to a specific task once this one is deleted.

Configure link
| Link condition | Details |
|---|---|
| PatternCondition | Set specific condition with java language |
| Otherwise | Punnet which doesn’t match other conditions will pass /!\ Used when task have multiple output links |
| AlwaysTrue | All punnets will pass, no matter what |
| AlwaysFalse | All punnets will be blocked, no matter what |
| PunnetInException | All punnets in exception will pass |
| ContentMimeTypeMatches | Filter depending on document mimetype |
| NumberOfDocuments | Filter depending on the number of document carried by the punnet |
| PunnetHasData | If an expected data exists the punnet will pass (punnet level) |
| DocumentHasData | If an expected data exists the punnet will pass (document level) |
| Or | Use multiple link conditions and if one of them is ok, the punnet will pass |
| And | Use multiple link conditions and if all of them are ok, the punnet will pass |
| Not | Use any link condition but with negatively |
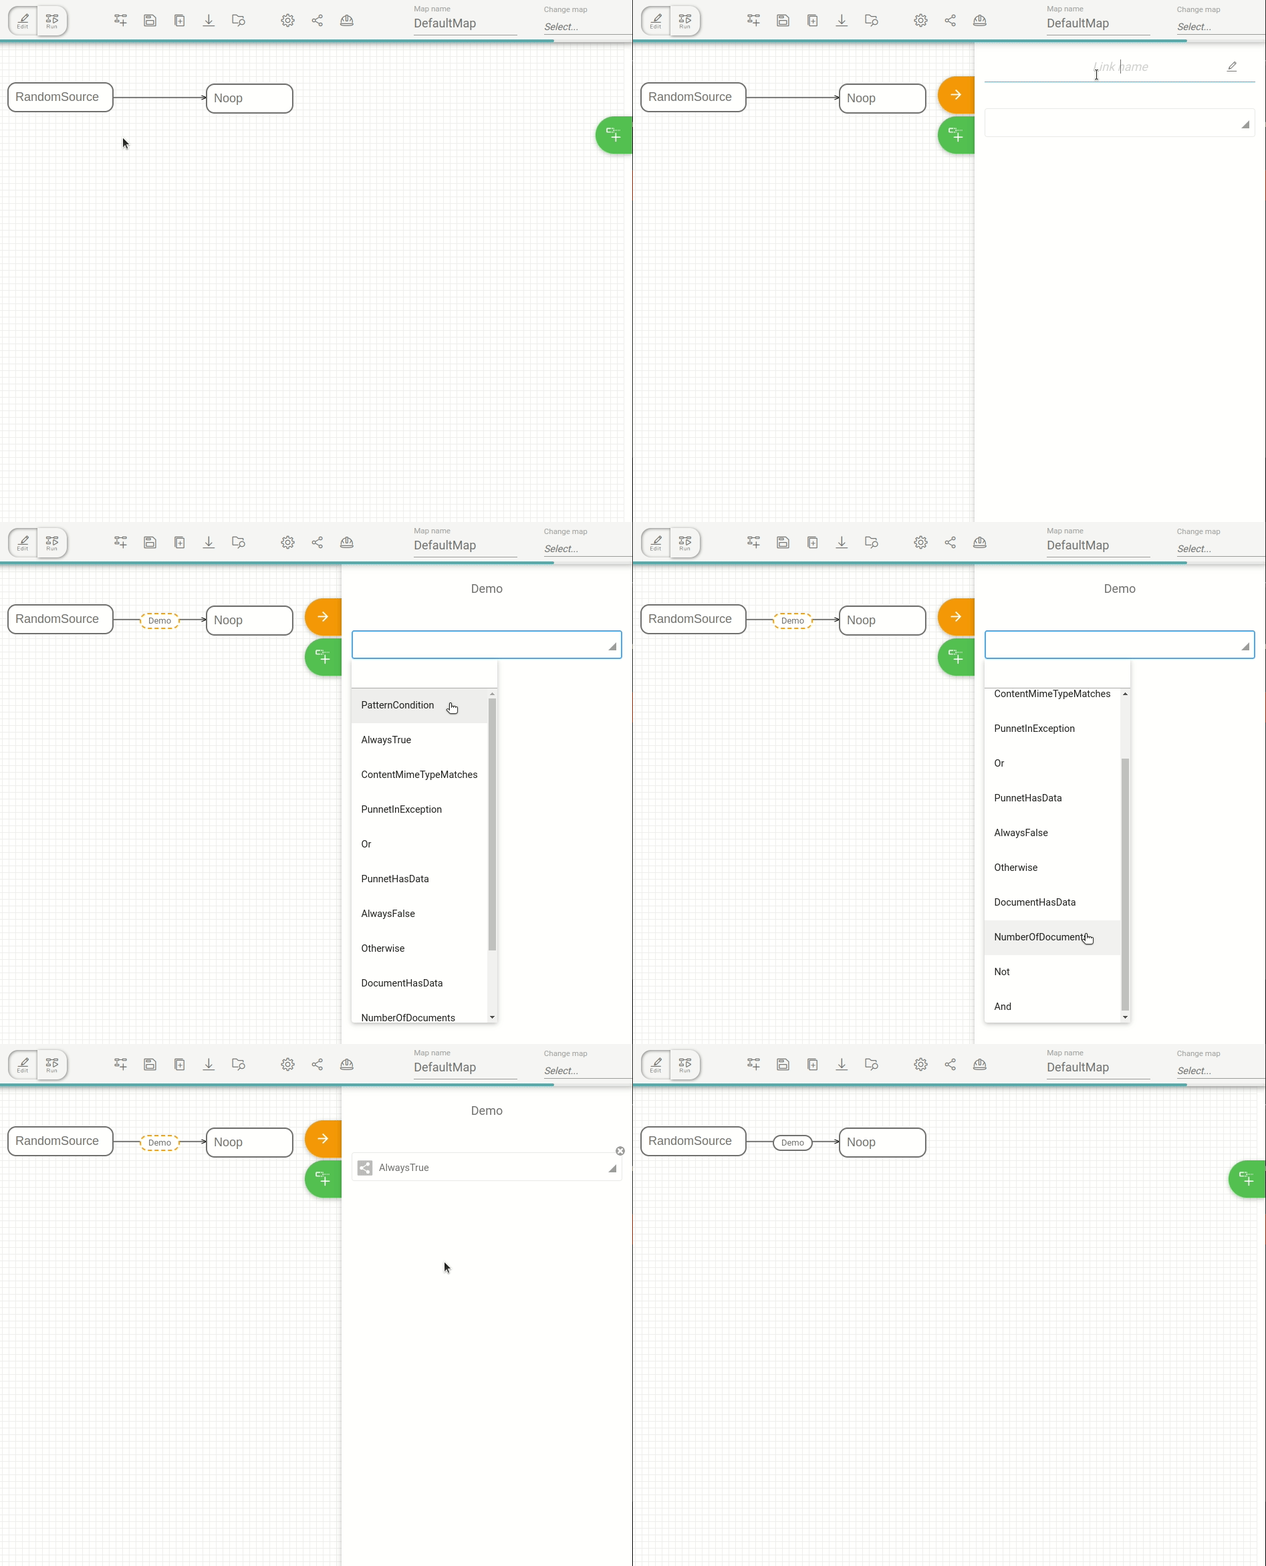
Delete link
Deleting a link is similar to deleting a task, 2-step long procedure. To delete a link, hover it in the design area. When it gets dark grey, click on the trash icon. On the confirmation pop-up, make sure you perform the operation on the link you really intended to delete.

Run a map
From the toggle button you are able to switch between the Design and the Run places.
Next to this toggle button, you’ll find the control buttons. It’s with these three buttons that you will be able to interact with the campaign.

From left to right :
- Run as new. When a campaign is run for the first time , a pop-up will ask you to put a name. Otherwise, a new campaign is created keeping the original campaign name and incrementing the
_Trynumber. - Rerun. Fast2 will run the same campaign again. No any campaign will be created.
- Stop. For a running campaign, you have the opportunity to stop its process. Notice that the stop button becomes a Resume button once the campaign is stopped.
When the map has at least been run once as new it is possible to replay a new run over it without necessarily doing as new. To do so, click on the blue play button surrounded by an arrow. Results for all replayed campaigns will be aggregated.
You can see in the table below the allowed actons depending on the campaign status.
| Campaign Status | Action(s) allowed |
|---|---|
| Started | Stop |
| Stopped | Start as new, Resume |
| Undefined | Start as new, Rerun |
| Finished | Start as new, Rerun |
New campaign name
You can create a new series of campaigns with a new name for a given campaign by modifying the campaign name textBox. If the new campaign name does not already exist you are automatically forwarded to the new one and ready to run it. It’s mainly a creation than a modification.
You cannot change the campaign name for an already existing one. The modification is aborted and the original name is putted back.
Example
Supposing you have a map named Production. You’ve decided to run this map and click on the Run as new button. Put the name of your campaign in the pop-up textBox, for example prodCampaign, and click on Start.
Fast2 will run your campaign but renaming it in prodCampaign_Try1. By hitting the Run as new again the pop-up will not show again since the map owns already few campaigns, one actually. Instead, a new campaign will be run and called prodCampaign_Try2 and so on.
Now, imagine that you want to rename your campaign with the name prodAlfresco. Click on the campaign textBox, put your new name. You’re gonna be redirected to a run place with your freshly created campaign. Hitting the Run as new and you will find you’re campaign prodAlfresco_Try1 running.
At this moment you have two series of campaigns related to your map Production.